Quick take
- A sourdough starter is maintained at a 1:1:1 ratio by weight — equal parts starter, flour, and water, a 100% hydration culture — per King Arthur Baking's feeding guide.
- A ripe, ready-to-bake-with starter typically doubles within 6–8 hours of feeding at around 70°F. The float test is a helpful clue, not proof on its own.
- Dough hydration (water as a percentage of flour weight) is a separate number from starter hydration. 65–70% is the manageable range for a first loaf; 80%+ is expert territory.
- Bulk fermentation — roughly 74–78°F for 2–5 hours — is where flavor and structure actually develop. It's not a step to rush past.
- An overnight cold retard (38–40°F) firms the dough for cleaner scoring and deepens flavor, and a preheated Dutch oven does the steaming a professional deck oven would.
Most sourdough recipes hand you a set of numbers — 500g flour, 350g water, bake at 450°F — without explaining what any of it is doing. That's fine until your loaf comes out dense, or your starter never seems to rise, or you can't tell if "bulk fermentation" is done in two hours or six. The actual process is chemistry with a schedule attached: wild yeast and lactic acid bacteria need specific conditions to do their job, and once you understand what those conditions are, the recipe stops being a ritual and starts being something you can troubleshoot. This is the real mechanics — starter, hydration, fermentation, and bake — sourced from the guides professional and serious home bakers actually use.
Building a starter from nothing
A sourdough starter is just flour and water left to ferment until it's colonized by wild yeast and lactic acid bacteria living on the grain and in the air. King Arthur Baking's method starts with equal weights of flour and water — commonly rye flour for the first couple of days, since its higher mineral and enzyme content gives fermentation an early boost — stirred into a loose paste and left uncovered-but-loosely-covered at around 72°F. For the first several days you discard most of the starter and feed what's left with fresh flour and water, which keeps the culture from becoming too acidic before it's established. By roughly day five, most methods shift to a 1:1 ratio of all-purpose flour and water by weight — a 100% hydration starter — which becomes the ongoing maintenance ratio.
There's no fixed day it "finishes." Depending on your kitchen's temperature, the flour you're using, and the wild yeast population in your environment, a starter can become reliably active anywhere from about a week to ten days in. The signal you're watching for isn't a calendar date, it's consistency — that it's ready.
Reading your starter — ripe vs. hungry
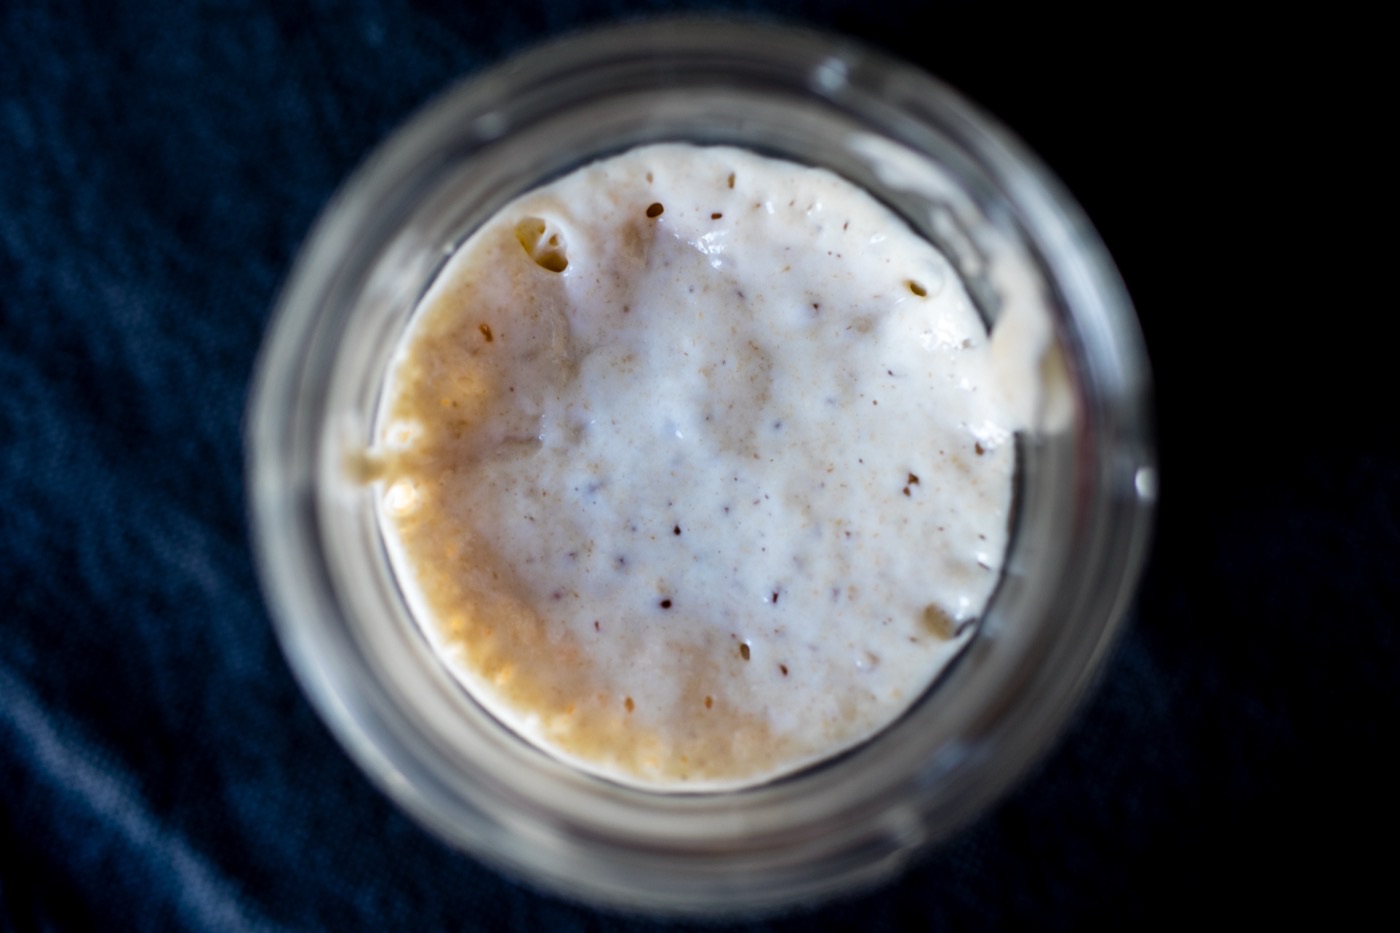
"Ripe" means a starter has been recently fed, has risen to its peak, and hasn't yet collapsed back down. King Arthur's guidance is that peak activity generally lands 6 to 8 hours after feeding at around 70°F, with the starter doubling in volume and showing uniform, champagne-like bubbles throughout. The float test — dropping a spoonful into water and watching whether it floats — is popular shorthand, but it's not definitive on its own: a starter that's still growing, and hasn't actually peaked yet, can float too. A starter that reliably doubles on a predictable schedule after feeding is a stronger signal than any single test.
Once a starter is established, it doesn't need daily feeding forever. Kept at room temperature, it wants feeding roughly every 12 hours. Kept in the fridge, once a week is enough — pull it out, discard down to a base amount, feed it equal parts flour and water, let it bubble on the counter for an hour or two, then refrigerate again.
Hydration: what the percentage actually means
Bakers describe dough using "baker's percentage," where flour is always treated as 100% and every other ingredient is expressed relative to it by weight. A dough at 70% hydration has 700g of water for every 1,000g of flour — full stop, regardless of the total batch size. This is a different number from your starter's hydration, and conflating the two is a common source of confusion for new bakers building their first recipe from scratch.
Lower-hydration dough (roughly 60–70%) is stiffer, easier to shape, and more forgiving of technique mistakes, which is why it's the recommended starting range for a first loaf. Higher hydration (75% and up) produces a wetter, stickier dough that's genuinely harder to handle, but rewards that difficulty with the big, irregular, glossy crumb associated with artisan bakery loaves. Neither is "more correct" — they're different tools for a different result.
| Hydration | Handling | Typical crumb |
|---|---|---|
| 60–65% | Stiff, easy to shape, very forgiving | Tight, even, good for sandwich-style loaves |
| 68–72% | Manageable — the standard beginner range | Balanced, moderately open |
| 75–78% | Sticky, needs confident handling | Open, some irregular holes |
| 80%+ | Slack, wet, genuinely difficult without practice | Very open, glossy, artisan-style |
Autolyse: resting flour and water before anything else
An autolyse is a short rest — commonly around 30 minutes, sometimes longer — where flour and water are mixed together and left alone before the starter and salt are added. During that rest, flour fully hydrates and gluten begins forming on its own, without any mixing effort from you. The Perfect Loaf's guide to autolyse notes that dough that's gone through this rest becomes noticeably smoother and more extensible — it stretches further before resisting or tearing — which makes the shaping steps later on considerably easier. It's a small step that mostly pays for itself in reduced kneading and better dough feel.
Bulk fermentation: the step that actually builds the bread
Bulk fermentation is the dough's first rise, after the starter and salt are mixed in and before it's divided or shaped. This is where the bulk of flavor development and structural rise actually happens, and it's the step most beginner recipes underexplain. The Perfect Loaf's guide puts the ideal range at roughly 74–78°F (23–25°C) for about 2 to 5 hours, though the honest answer is that the exact time depends on your starter's strength, your flour, and your kitchen — the temperature and time are a starting point, not a rule.
Rather than a single test, judging readiness is a holistic read: the dough should go from shaggy to smooth, with edges that resist stretching instead of tearing immediately; it should look puffy and jiggle slightly when the container is nudged; and — because whole-grain and higher-hydration doughs don't always double the way pure white-flour dough does — a 20–30% rise can be entirely normal for some doughs, not a sign something went wrong. Stretch-and-fold sets, typically a handful spaced through the early part of bulk fermentation, strengthen the dough, even out its temperature, and give you a hands-on read on how fermentation is progressing.
Process checkpoints: what's actually happening at each stage
Autolyse
Flour and water rest, undisturbed, for ~30 minutes before the starter and salt go in.
Bulk fermentation
The longest and most important stage. Roughly 74–78°F for 2–5 hours, with stretch-and-folds spaced through the early portion to build strength. This is where most of the actual sourdough flavor and the dough's rise capacity are built — rushing it is the single most common reason a home loaf comes out flat or dense.
Shaping
Dough is gently formed into a tight round or oval and moved into a floured banneton or bowl.
Cold retard
An overnight rest in the fridge, typically 38–40°F for 4 to 24 hours. It firms the dough so it holds its shape and scores cleanly, and it slows fermentation just enough to deepen flavor without overproofing.
Scoring
A blade cut, ¼–½ inch deep, at a shallow angle, right before baking.
Baking
Covered in a preheated Dutch oven first, then uncovered to finish and color the crust.
Shaping and the cold retard
After bulk fermentation, the dough is gently shaped — usually into a tight round (boule) or oblong (batard) — and placed seam-up in a floured banneton or a bowl lined with a floured towel. Rather than proofing at room temperature and rushing to the oven, most serious sourdough methods retard the shaped dough in the refrigerator overnight, typically in the 38–40°F range for 4 to 24 hours. The cold slows fermentation without stopping it, which does two things at once: it deepens the sour flavor through extended, slower fermentation, and it firms the dough enough to score cleanly and hold its shape when it hits the hot oven.
The classic "poke test" — pressing a floured finger into the dough and watching how it springs back — only works reliably on room-temperature dough. Poked cold, straight from the fridge, dough behaves differently and the test isn't a fair read. If you're baking straight from a cold retard, judge readiness before it goes into the fridge, or let it sit briefly at room temperature before testing.
Scoring and baking in a Dutch oven
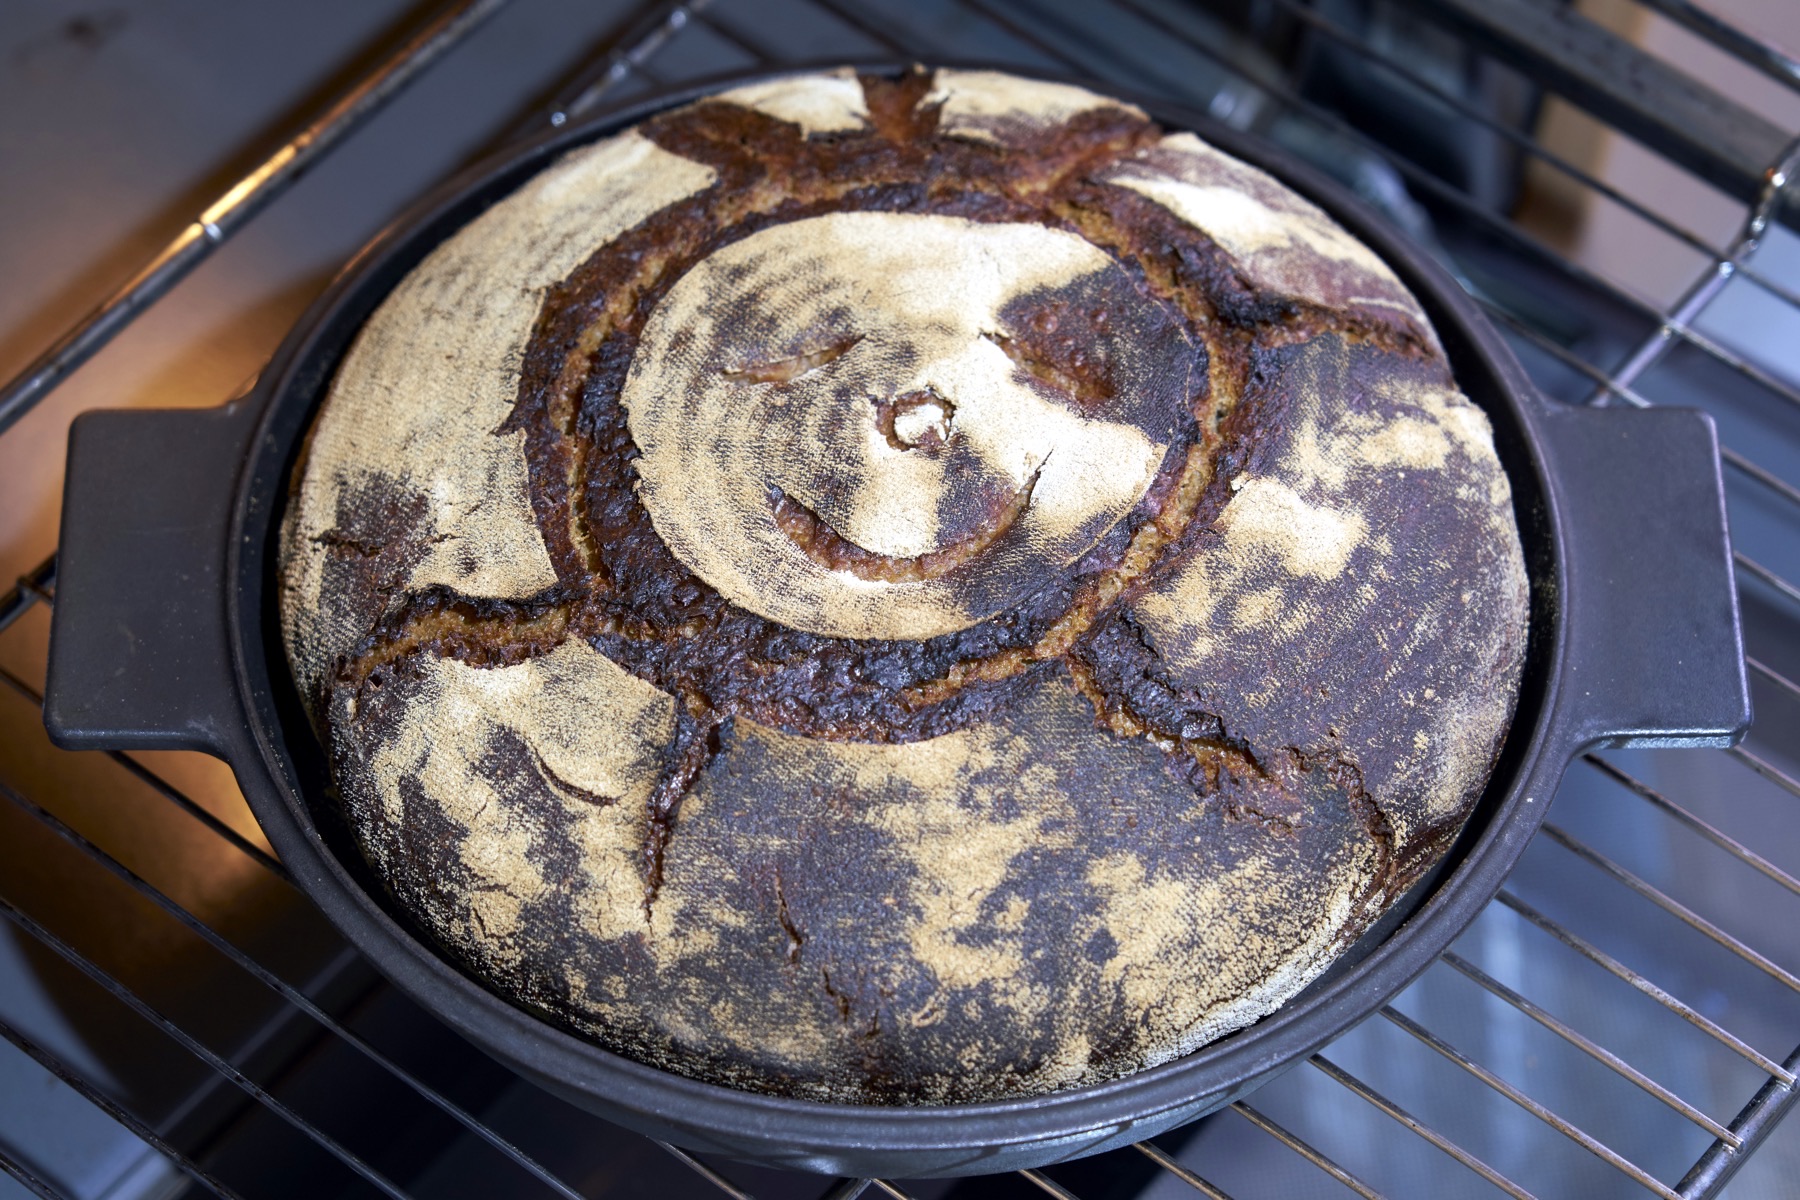
Scoring — cutting the surface of the dough right before it bakes — isn't decorative. It gives the loaf a deliberate, weak point for expanding gas to escape through, so the crust doesn't tear randomly wherever it happens to be thinnest. The typical technique holds the blade at a shallow 30–45 degree angle to the dough's surface, cutting roughly ¼ to ½ inch deep; cold, firm dough straight from the retard is genuinely easier to score cleanly than warm, slack dough.
A Dutch oven is the common home substitute for the steam-injected deck ovens professional bakeries use. Preheating it — commonly for a full 45 to 60 minutes at 450–500°F — means the dough hits a hot, evenly heated vessel the moment it goes in. Baking covered for the first portion traps the steam the dough itself releases, keeping the crust flexible long enough for the loaf to fully expand ("oven spring") before it sets. The lid then comes off to let the crust dry out, color, and crisp for the remainder of the bake.
| Stage | Approx. time |
|---|---|
| Autolyse (flour + water rest) | ~30 min |
| Bulk fermentation (74–78°F) | 2–5 hrs, with stretch-and-folds early on |
| Shape, then cold retard (38–40°F) | 4–24 hrs, usually overnight |
| Dutch oven preheat (450–500°F) | 45–60 min |
| Bake, covered | ~20 min |
| Bake, uncovered (crust color) | ~20–25 min |
Common questions
Do I actually need a kitchen scale?
Yes, if hydration matters to you at all. Baker's percentages and starter feeding ratios are weight-based; scooped cup measurements of flour can vary by 15% or more, which is enough to turn a 70% hydration dough into something closer to 60% or 80% without you realizing it.
Is the float test reliable?
It's a useful clue, not proof. A starter that's still growing but hasn't fully peaked can float too, so a doubled, bubbly starter on a consistent 6-to-8-hour schedule after feeding is the stronger signal.
Can I skip the cold retard?
You can bake same-day after bulk fermentation and a shorter room-temperature final proof. You'll lose some flavor depth and the firmer, easier-to-score dough an overnight cold retard gives you, but it's still real sourdough.
Do I need a Dutch oven specifically?
You need something that traps steam around the loaf early in the bake. A Dutch oven is the common home solution because its lid holds in the steam the dough releases, keeping the crust flexible long enough for full oven spring before it sets.
Why did my loaf come out dense or gummy?
The two usual culprits are an underripe starter (not enough fermentation power in the dough) or bulk fermentation cut short. Both leave the dough without enough structure and gas to support an open crumb — and slicing before the loaf has fully cooled can make the crumb look gummier than it actually is.
Sourdough isn't a recipe you follow once and repeat — it's a small set of variables (starter ripeness, hydration, temperature, time) that you learn to read and adjust. None of the individual steps are hard on their own: feeding a starter, resting flour and water, folding a dough a few times, scoring at an angle. What makes sourdough feel difficult is skipping the "why" and treating every step as a fixed instruction instead of a lever you can actually see and feel. Once bulk fermentation and hydration stop being mysterious numbers, the rest of the process gets a lot more forgiving.
Disclosure. DopamineKart has no sponsorship or business relationship with King Arthur Baking or The Perfect Loaf. No affiliate links appear in this article. Techniques and figures above are drawn from King Arthur Baking's sourdough guide, King Arthur Baking's starter feeding recipe, and The Perfect Loaf's bulk fermentation guide and autolyse guide, cited inline throughout. Exact timing will vary by kitchen, flour, and starter — treat every number here as a starting range, not a guarantee. Photography is real, credited Wikimedia Commons imagery.
Corrections: email us