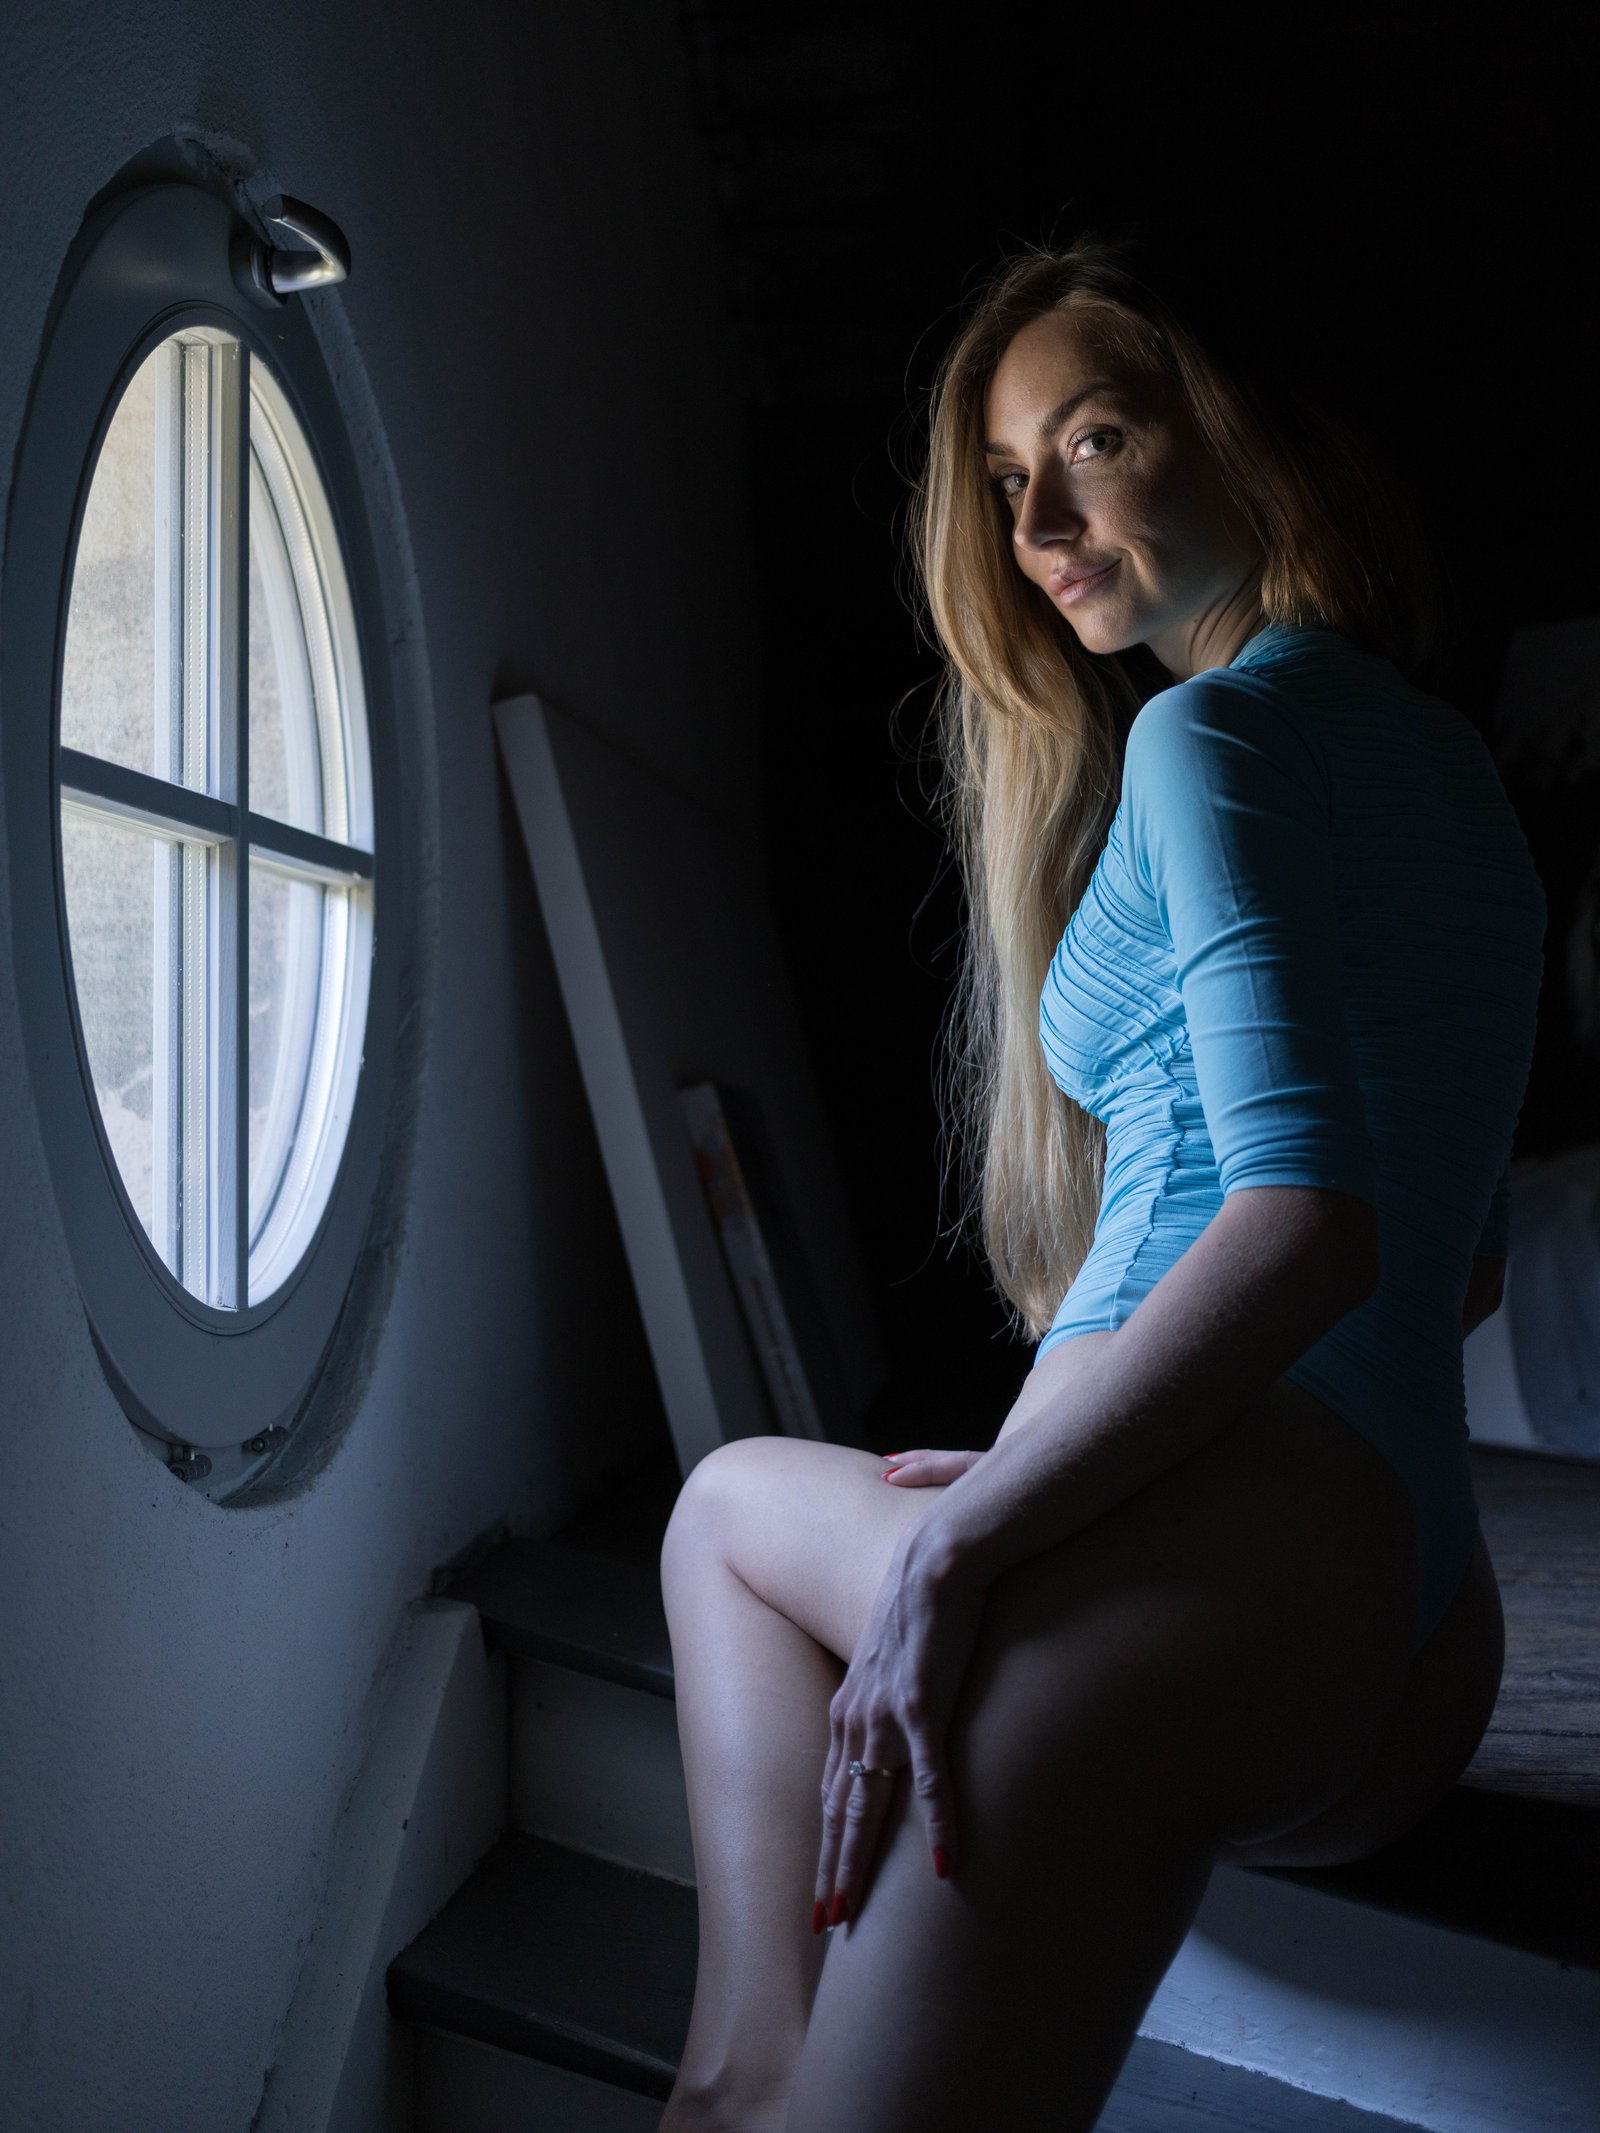
Quick take
- These six patterns are the standard vocabulary taught by the Professional Photographers of America and photographers like Sue Bryce and Peter Hurley — a window just substitutes for a studio strobe.
- Only two variables define every pattern: the angle of the face to the window, and how far around the room the photographer stands.
- A visible catchlight in the eye is the single fastest way to tell an intentional portrait from an accidental one — check it before anything else.
- Distance from the window controls how forgiving the shadow looks; angle controls which pattern you get. They're independent controls.
Every portrait photography school teaches some version of the same handful of lighting patterns — butterfly, loop, Rembrandt, split, broad, short. They were named and codified decades before ring lights existed, because they describe something physical: where a shadow falls when light hits a round object at a given angle. A window does exactly what a studio strobe does. It's just free, and it's already in your apartment.
The setups below aren't a phone-camera gimmick. They're the standard vocabulary taught by portrait organizations like the Professional Photographers of America and repeated in glamour and headshot courses from photographers such as Sue Bryce and Peter Hurley — the difference here is substituting a north-facing window for a beauty dish or softbox. The physics is identical: a single broad, soft light source, moved around a face, produces a small set of predictable, repeatable results.
The setup, before the patterns
All six patterns below assume the same starting conditions:
- A window with soft, indirect daylight — north-facing or overcast light is more forgiving than direct afternoon sun, which creates harsh, high-contrast shadows.
- The subject facing the window, not the camera facing it — the photographer stands with their back roughly toward the light, or off to the side, depending on the pattern.
- A plain white surface (a foam board, a poster, even a bedsheet) opposite the window, out of frame, to bounce light back into the shadow side of the face and keep it from going fully black.
- The phone's ultra-wide (0.5x) lens avoided for close portraits — it exaggerates nose and forehead size at close range. The main or "1x" lens, backed up a step or two, keeps proportions natural.
- Exposure locked (tap and hold on the face in most phone camera apps) so the camera doesn't auto-brighten the shadow side and flatten the whole effect.
The six patterns
Each one is defined by two things only: the angle of the subject's face to the window, and how far around the room the photographer stands. Nothing here requires more than a chair and a wall to move along.
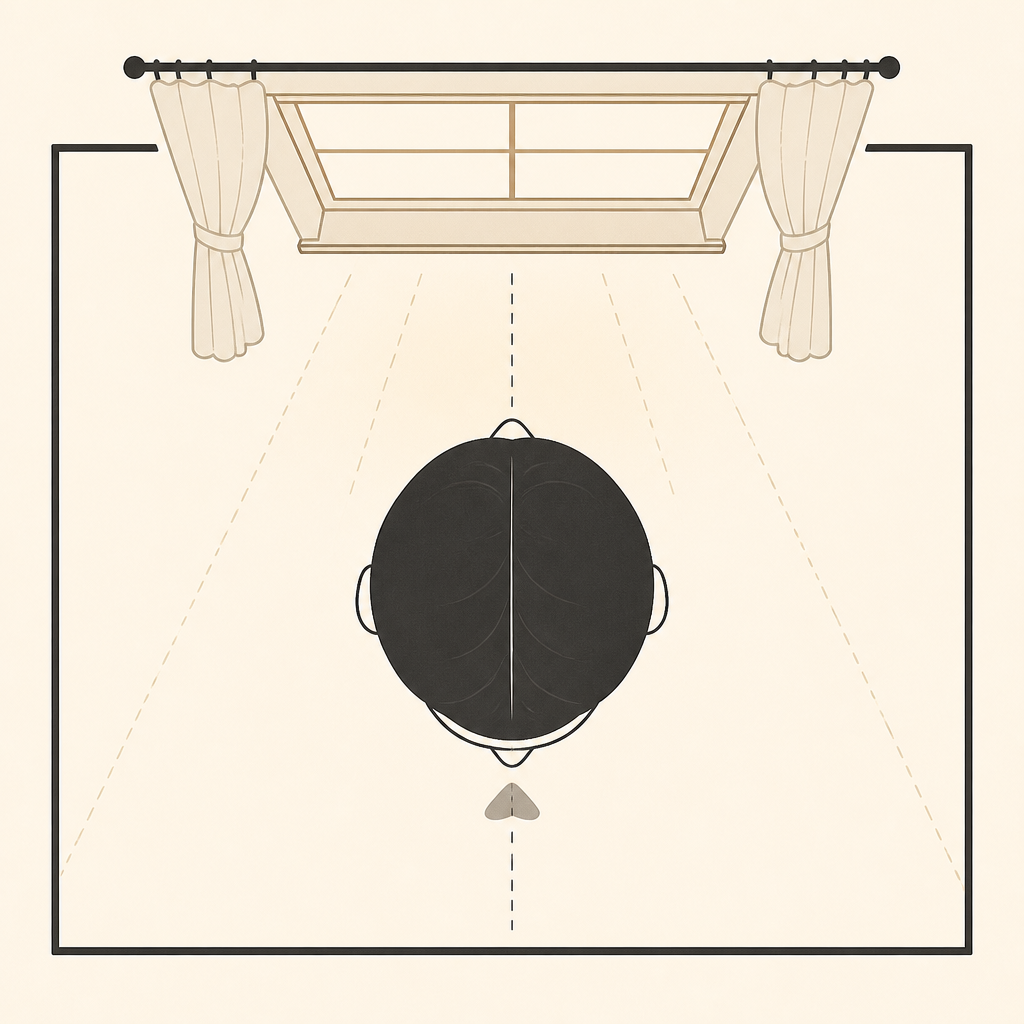 AI-generated illustration (OpenAI gpt-image-2). Not a photograph, and not a picture of a real person.
Butterfly (Paramount)
Subject faces the window straight-on, light comes from just above eye level. Named for the small butterfly-shaped shadow it casts directly under the nose. The classic glamour pattern — it flatters cheekbones but can deepen under-eye shadows, so it rewards a slight upward tilt of the chin.
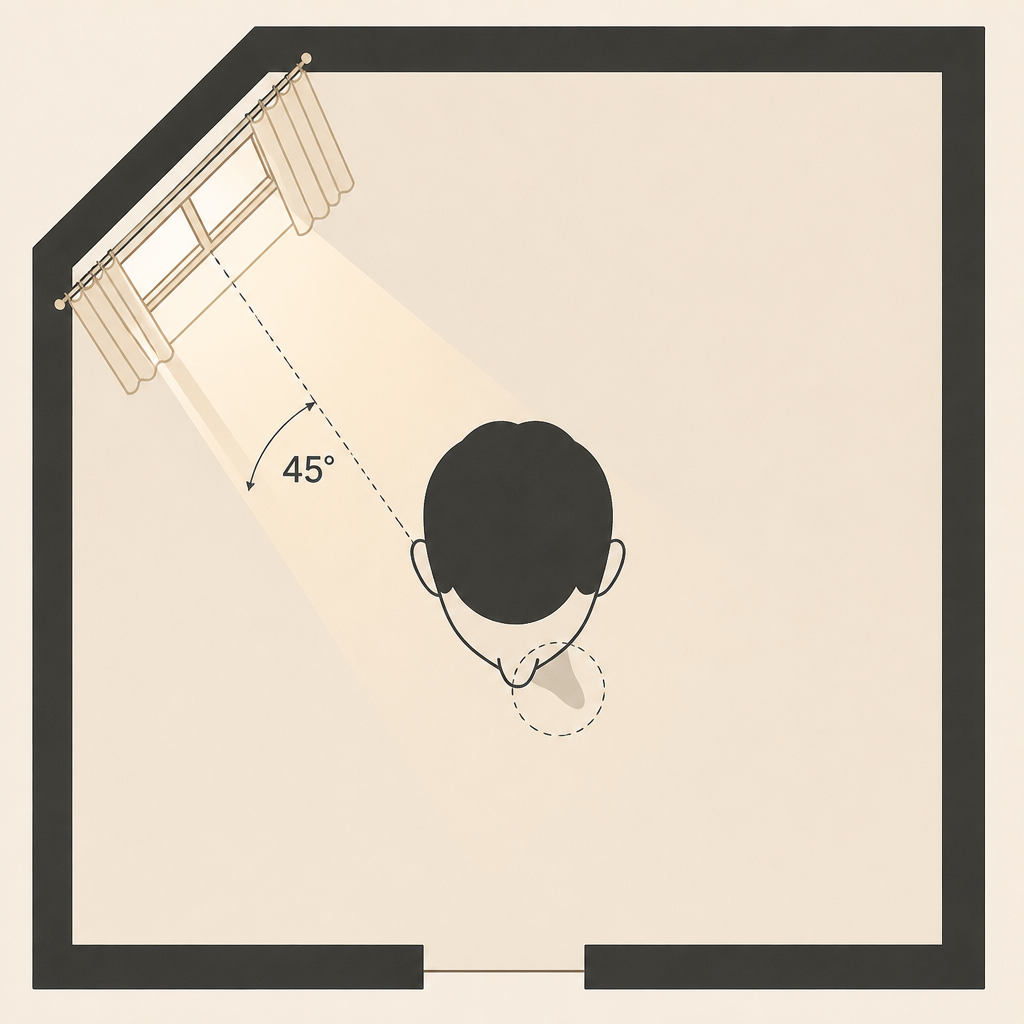 AI-generated illustration (OpenAI gpt-image-2). Not a photograph, and not a picture of a real person.
Loop Lighting
The window sits at roughly a 45-degree angle to the face. It produces a small, tilted shadow "loop" beside the nose without touching the lip. Instructors consistently call this the most universally flattering pattern because it works on nearly every face shape.
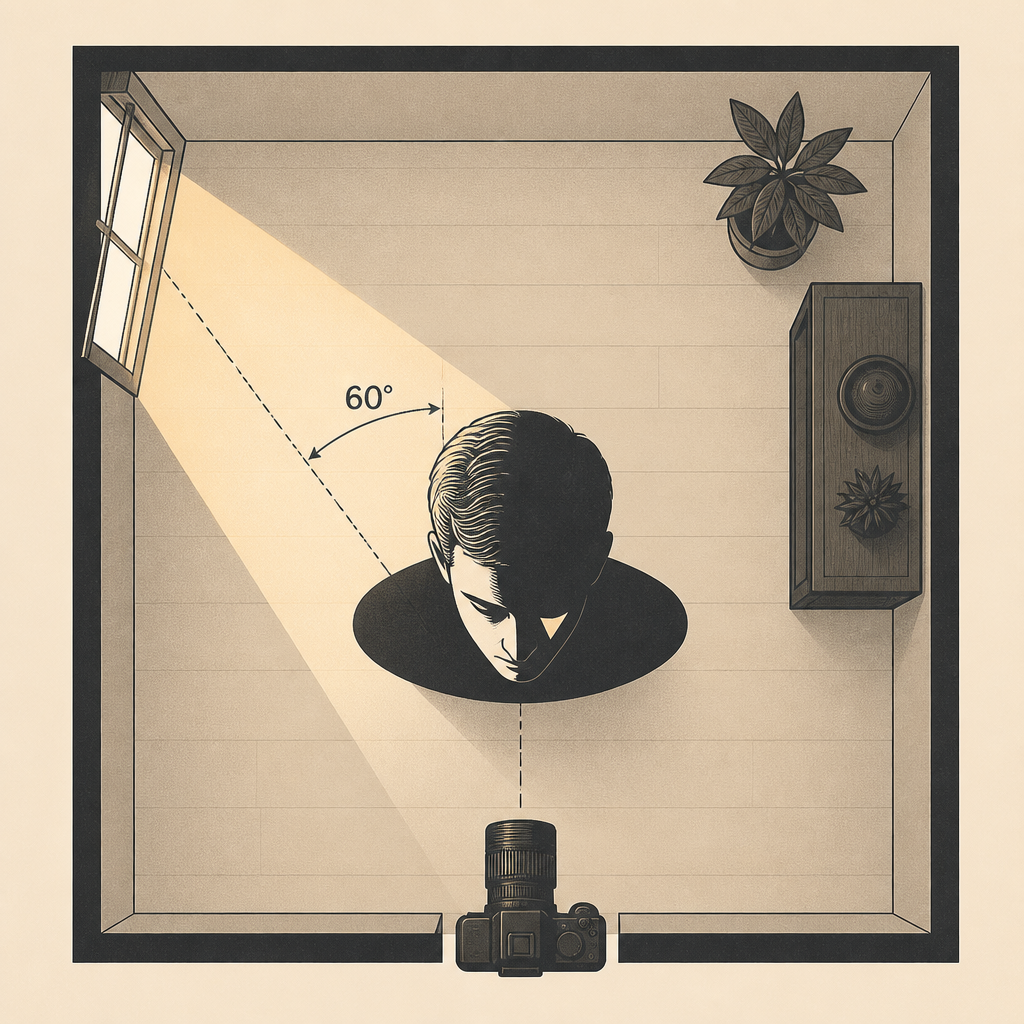 AI-generated illustration (OpenAI gpt-image-2). Not a photograph, and not a picture of a real person.
Rembrandt Lighting
Turn a little further into the window — closer to a 60-degree angle — until a small, distinct triangle of light appears on the shadowed cheek. Named after the painter, who used this exact fall of light in his self-portraits centuries before it had a photographic name.
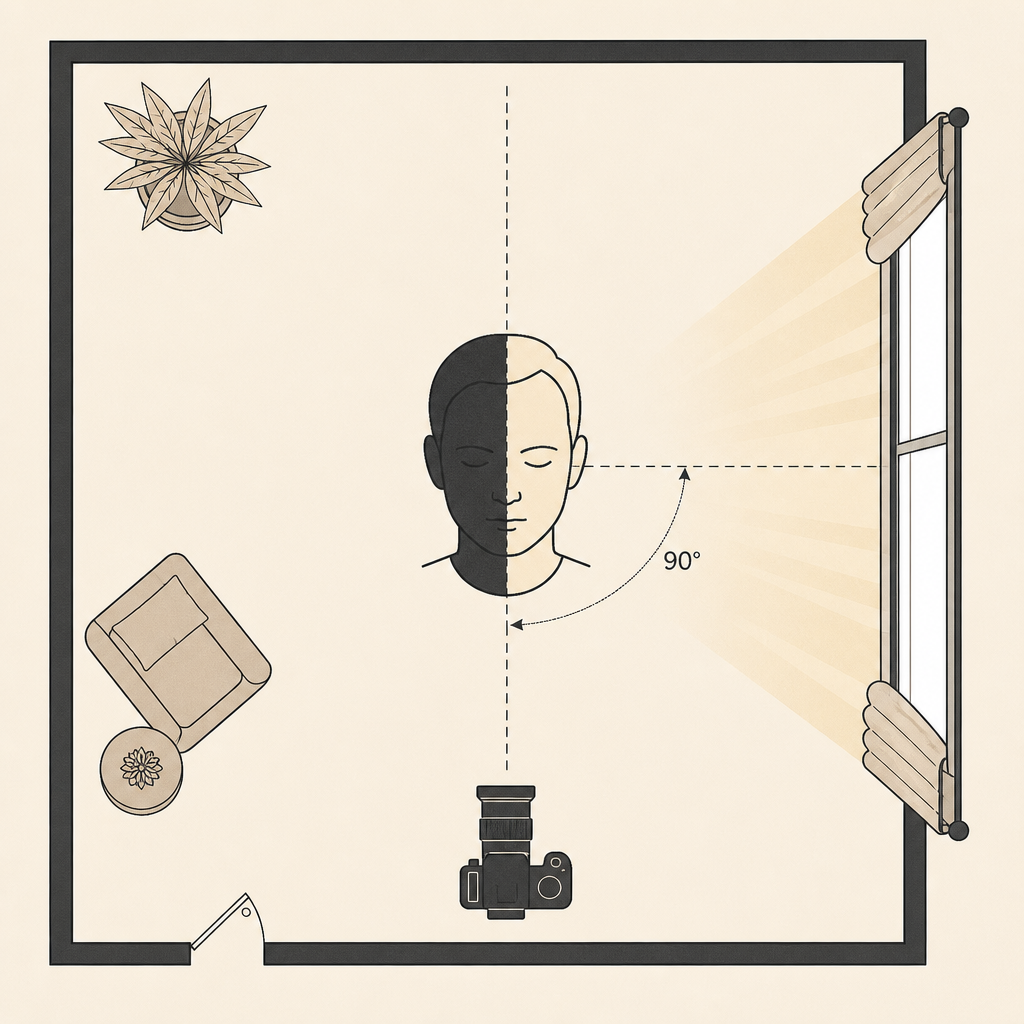 AI-generated illustration (OpenAI gpt-image-2). Not a photograph, and not a picture of a real person.
Split Lighting
The window is at 90 degrees — directly to the side. Exactly half the face is lit, half falls into shadow, split down the bridge of the nose. The pattern most associated with editorial and cinematic portraits — the white bounce card on the shadow side matters most here.
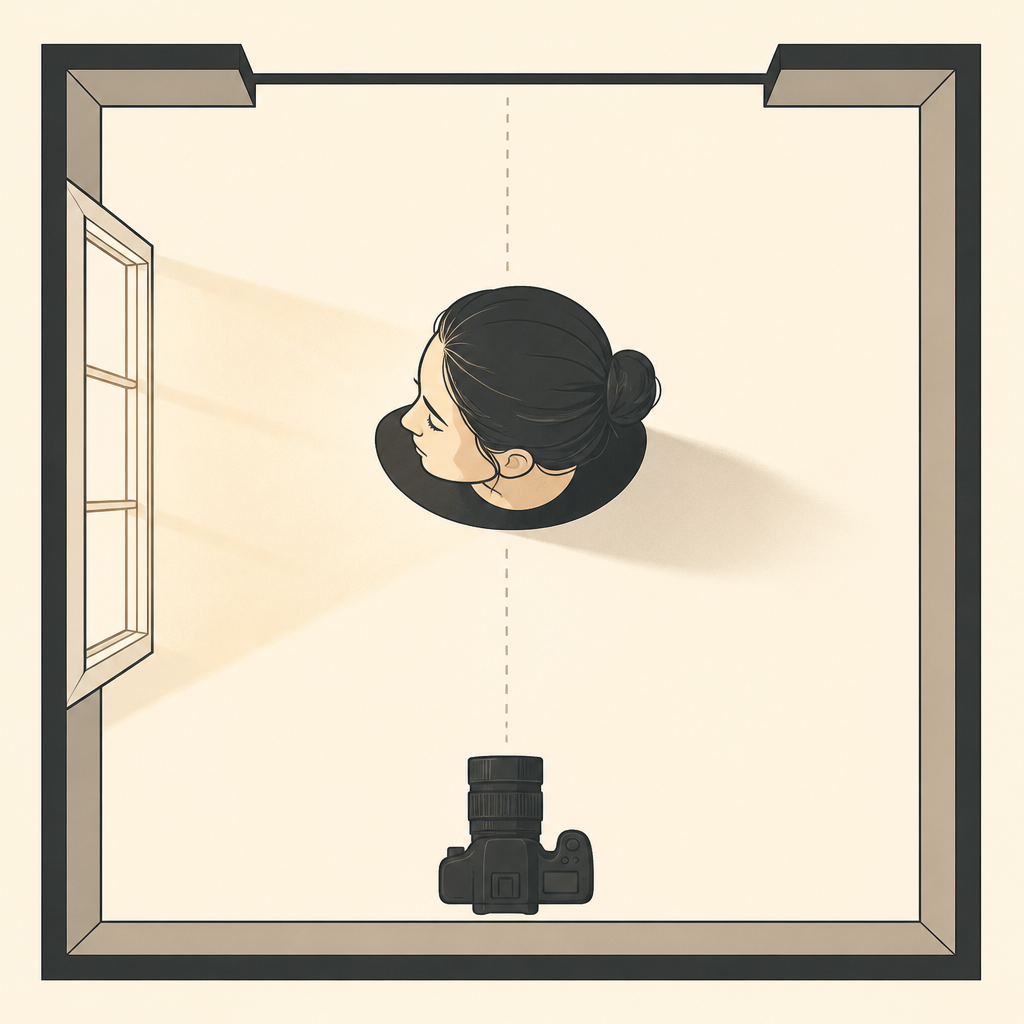 AI-generated illustration (OpenAI gpt-image-2). Not a photograph, and not a picture of a real person.
Broad Lighting
This one isn't about the window's angle — it's about which way the head is turned relative to the camera. In broad lighting, the subject turns slightly so the side of the face closer to the camera is the lit side, which visually widens the face.
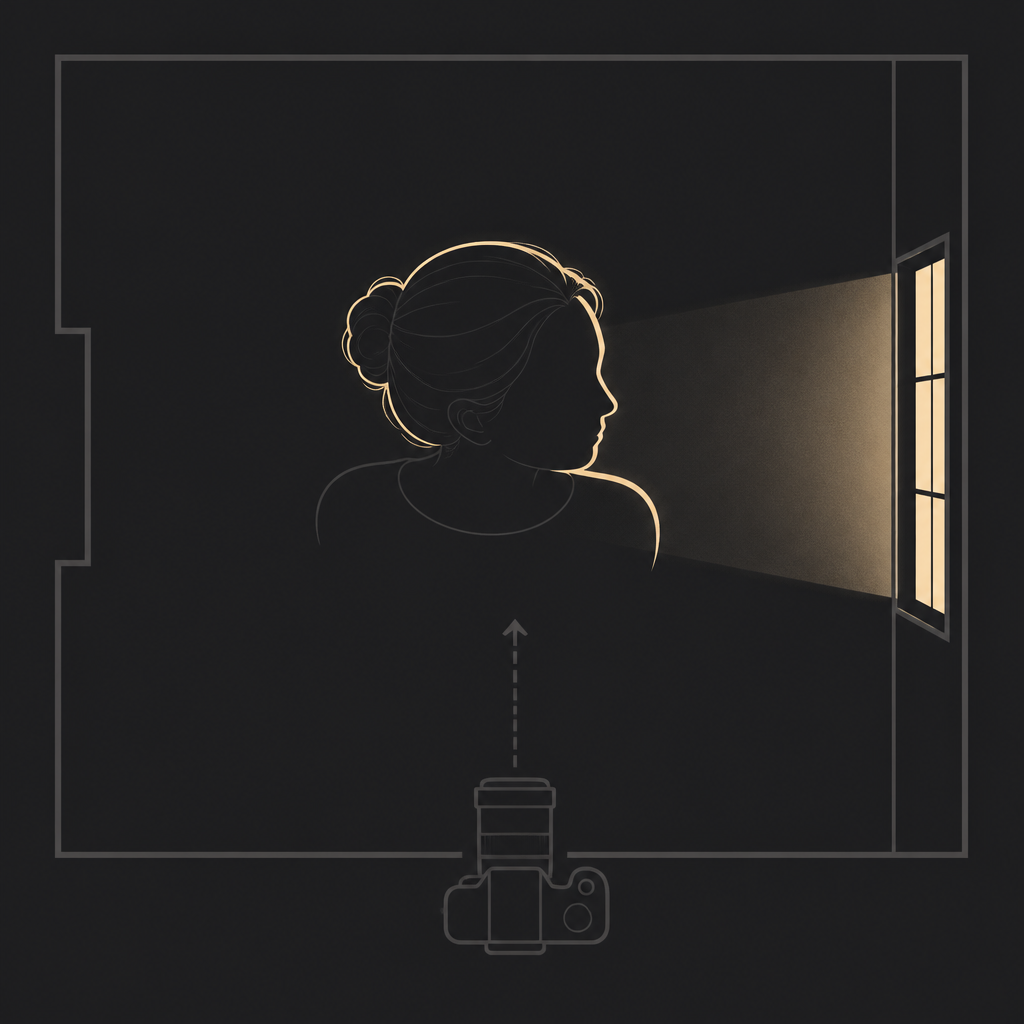 AI-generated illustration (OpenAI gpt-image-2). Not a photograph, and not a picture of a real person.
Short Lighting & Backlight
The mirror image of broad lighting — the far side of the face is the lit side, and the near side falls into shadow. Most portrait photographers default to short lighting because it slims and adds dimension. Taken further, it becomes a rim or backlight outlining the hair and shoulders.
Two details that matter more than the pattern
Catchlights
Every pattern above will look flat without a visible catchlight — the small reflection of the window itself in the eye. It's a small technical detail, but it's the single fastest way to tell a portrait taken with intention from one taken by accident: check the eyes before checking anything else.
Distance from the window, not just angle
Moving a subject two steps closer to the window softens the shadow edges (a bigger light source relative to the face means a softer transition from light to shadow); moving them back hardens and narrows the beam. Angle decides which pattern you get. Distance decides how forgiving it looks.
| Pattern | Angle | Effect |
|---|---|---|
| Butterfly | Straight-on, light above eye level | Flatters cheekbones, deepens under-eye shadow |
| Loop | ~45° | Most universally flattering, works on nearly every face |
| Rembrandt | ~60° | Moody, dimensional, contemplative mood |
| Split | 90° | Editorial/cinematic, half the face fully shadowed |
| Broad | Head turn, near side lit | Widens the face |
| Short / rim | Head turn, far side lit | Slims the face, adds dimension |
None of this requires special equipment. A north-facing window, a chair, and a plain wall to bounce light off of will produce every pattern above. The variable that actually matters is patience — moving in small increments and checking the shadow under the nose and cheek after each one, rather than guessing the angle from across the room.
Common questions
Which lighting pattern should a beginner start with?
Loop lighting — instructors consistently call it the most universally flattering because it works on nearly every face shape.
Do I need direct sunlight?
No — indirect, north-facing or overcast light is more forgiving than direct afternoon sun, which creates harsh, high-contrast shadows.
Why does my portrait look flat even with good light?
Check for a catchlight — the small reflection of the window in the eye. Without it, even correct lighting reads as flat.
What does the white bounce card actually do?
It reflects light back into the shadow side of the face so it doesn't go fully black — most important for high-contrast patterns like split lighting.
Does my phone's camera lens matter?
Yes — avoid the ultra-wide (0.5x) lens for close portraits, since it exaggerates nose and forehead size. Use the main lens, backed up a step or two.
None of this requires special equipment. A north-facing window, a chair, and a plain wall to bounce light off of will produce every pattern above. The variable that actually matters is patience — moving in small increments and checking the shadow under the nose and cheek after each one, rather than guessing the angle from across the room.
Honesty note. This guide describes standard, long-documented portrait lighting technique — it does not test or endorse any camera, app, or piece of gear, and nothing in it is sponsored. No prices or purchase links are included because none are needed: everything described here uses light you already have and objects most homes already contain. Real photography is Wikimedia Commons, credited above. Diagram illustrations are AI-generated (OpenAI gpt-image-2), used only to depict the physical geometry of each lighting pattern — never a real photograph or real person.
Corrections: email us